Quick Answer: The best Quacks of Quedlinburg strategy comes down to three things: tracking your white chip density so you know when to stop pulling, building a focused bag around one or two color synergies instead of buying everything in sight, and switching from coins to victory points at the right moment in the 9-round arc. Nail those three and you’ll win more often than not — even when the bag gods aren’t cooperating.
Quacks of Quedlinburg took home the Kennerspiel des Jahres in 2018, and it deserved it. On the surface it looks like a luck game — you’re literally pulling chips out of a bag — but the best Quacks of Quedlinburg strategy is genuinely skill-driven. Designer Wolfgang Warsch built a system where the chaos is manageable. You can calculate risk, build efficient engines, and make decisions that compound over nine rounds. The players who write it off as pure luck are usually the ones who never learned to count their white chips.
How the Game Actually Works
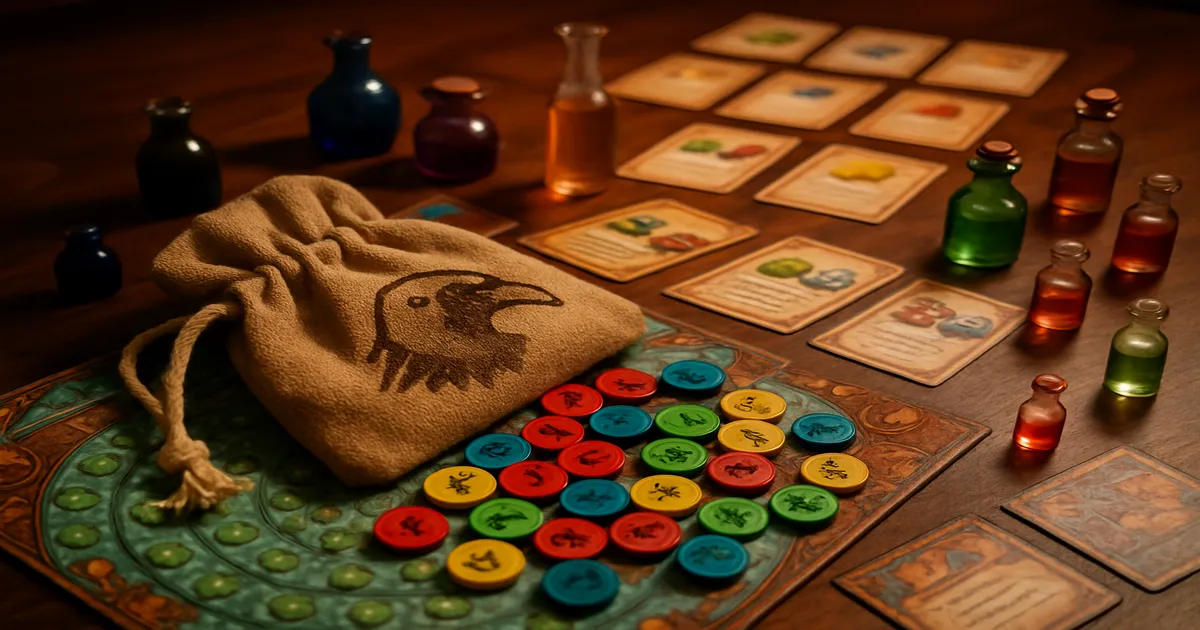
Each player has a cloth bag full of ingredient chips. On your turn, you draw chips one at a time and place them on a spiral cauldron track, working outward from the center. The further you get, the better your rewards — but white chips are a ticking clock.
Everyone draws simultaneously (a big plus for keeping things moving), then each player decides when to stop. After drawing, you score based on how far you got on the spiral, buy new chips with coins, and collect any rat stone bonuses. Nine rounds, then count up VP.
The most important single decision each round is the VP vs. coins choice in the scoring phase. Non-exploded players pick one or the other — not both. Exploded players lose that choice entirely and take a penalty on top of it. That asymmetry is exactly what makes explosion management matter.
One rule most new players get wrong: you explode when the total value of white chips in your cauldron exceeds 7 — not when you draw a seventh white chip. A single white “4” chip counts as four points toward that threshold. Two white “3” chips and one white “2” chip puts you at 8 and triggers an explosion. Chip values, not chip count.
Master the Explosion Math First
Track Your White Chip Density in Real Time
You’re allowed to count the chips you’ve already drawn — and you absolutely should. Your cauldron spiral shows you exactly what’s been pulled from your bag, which means at any point during your draw phase you can estimate what’s left.
My practical benchmark: when white chips make up more than roughly 30–35% of your remaining bag contents, explosion risk rises sharply enough that you should think hard before pulling again.
Quick example: you’ve drawn most of your bag and you can see 3 white chips remain among 8 total undrawn chips. That’s 37.5% white density — above the threshold, and a clear signal to stop unless you’re desperate for distance.
Your cauldron isn’t just a scoring track; it’s a live probability display. Every chip sitting on that spiral is a chip that isn’t in your bag anymore. Experienced players glance at their cauldron constantly during the draw phase, not just at the end.
How Often Should You Actually Explode?
Roughly 2–3 times across all 9 rounds is the experienced-player sweet spot. Zero explosions almost always means you were too cautious and left significant points and coins on the table. More than 4–5 suggests you’re not reading the bag odds well. Over-caution is a real problem — don’t let fear of exploding turn you into someone who stops when the math still favors pulling.
One more thing worth knowing: when you do explode, you spin the Fortuna wheel, which softens the penalty. Factor that expected value into borderline pull decisions. Explosions aren’t purely catastrophic, and treating them as such leads to overly conservative play.
Build a Focused Bag, Not a Big One
Here’s the most counterintuitive thing about Quacks: adding chips to your bag can make you weaker. Every chip you add dilutes the draw probability of the chips you actually want. A tight, well-curated bag of 15 chips will usually outperform a bloated bag of 30.
Avoid loading up on cheap white chips early. They’re tempting because they feel like progress, but every extra white chip raises your explosion risk and waters down your colored chip draws. Buy whites only when you have a specific reason — not just because you have leftover coins.
Green Mandrake Root chips are underrated. They remove other chips from your bag when drawn, which means instead of just adding something new, you’re improving the average quality of every future draw. I’d rather have one green chip than three cheap whites in most situations. If your ingredient book has a good green option, take it seriously.
The Best Quacks of Quedlinburg Strategy by Chip Color
Always read the active ingredient book before committing to a color — the same chip can have meaningfully different powers depending on which book is in play. That said, three synergy archetypes tend to be consistently strong.
Orange + Purple: The Safe Long-Pull Combo. Orange (Pumpkin Seeds) chips extend your cauldron spiral, giving you more space before the explosion threshold kicks in. Purple (Herb Woman’s Herb) chips reward you for having lots of chips in your cauldron — the more you’ve drawn, the bigger the bonus. Together, they let you pull longer with less risk. It’s a defensive strategy with a high floor, and it’s forgiving for players still learning the bag math.
Black + Red: The Aggressive Point-Scoring Build. Black (Nightshade) chips score bonus points based on their position on the spiral — further out means more points. Red (Toadstool) chips activate when drawn alongside other colors. High ceiling, but this combo punishes explosions more than orange/purple does. It rewards players who are confident in their bag math and willing to push.
Yellow + Green: The Economic Engine. Yellow (Nux Vomica) chips generate coins when drawn; green chips thin your bag. Together they create a self-reinforcing loop — more coins, better chips, remove the weak ones, repeat. It’s slower to get going but produces a beautifully efficient bag by mid-game.
One more thing: chip supply at the ingredient stalls is limited. If another player is deep into purple chips, you’re competing for the same pool. Either get there first or pivot to a color they’re not hoarding.
When to Take Victory Points vs. Coins
Rounds 1–4: Take coins. Coins you earn in round 2 pay off for seven more rounds. That’s a long runway. Unless you’re already behind on the scoring track, invest in your bag aggressively.
Rounds 5–7: Start balancing. Check your scoring track position. If you’re behind, mix in some VP to stay competitive for rat stone bonuses. If you’re ahead, you can keep investing — but don’t ignore VP entirely or you’ll stall out.
Rounds 8–9: Take VP. With one or two buy phases left, coins have almost no time to compound. This is the most common mistake I see from intermediate players — hoarding coins in round 8 out of pure habit.
On rubies: Rubies can either advance you on the scoring track or add a chip directly to your bag. Early game, adding a chip directly is almost always better — it skips the buy phase entirely. Late game, advancing on the scoring track for end-game bonus VP is usually the right call.
Don’t sleep on the rat stone catch-up mechanic either. The player furthest behind on the scoring track gets bonus rubies and actions each round. It’s a deliberate design choice, not an afterthought, and trailing players who use it well can absolutely make a serious late-game run. Some experienced players even play conservatively in early rounds to stay near the bottom and stockpile rat stone bonuses, then surge in rounds 7–9. It’s not a default strategy, but it works.
Common Mistakes That Cost Players the Game
Misreading the explosion rule. Total white chip value over 7, not number of chips. Worth repeating because it changes your risk calculus significantly.
Buying random colors without a plan. Walking up to the ingredient stalls and grabbing whatever looks interesting is how you end up with a bag full of chips that don’t work together. Pick a direction in round 1 and commit. You can adjust, but you need a starting plan.
Ignoring the scoring track. Your position determines who gets rat stones each round. If you’re not tracking it, you’re missing bonuses that can swing a close game.
A good insert or organizer makes setup and teardown much faster, especially if you’re playing with the expansion — the chip sorting alone can add 10 minutes without one.
Frequently Asked Questions
What’s the best starting strategy in Quacks of Quedlinburg?
Prioritize coins over VP in the first two or three rounds, and pick one or two chip colors to build toward — don’t spread purchases across every color. Avoid cheap white chips unless you have a reason. If green Mandrake Root is available in your ingredient book, it’s worth considering early because bag thinning pays off for the entire game.
How many times should you explode in Quacks of Quedlinburg?
Roughly 2–3 times across 9 rounds is the sweet spot. Zero explosions usually means you were too cautious. More than 4–5 suggests you’re not reading the bag odds well or taking risks the math doesn’t support.
Is Quacks of Quedlinburg good at 2 players?
It works at 2, and the simultaneous draw mechanic keeps it from feeling slow. But honestly, it’s noticeably better at 3–4. The catch-up mechanics and chip competition at the stalls feel more dynamic with more players. Still enjoyable at 2 — just not the optimal count.
What happens when you explode?
When your white chip total exceeds 7, your pot explodes. You must choose between taking VP or coins — not both — and your scoring token moves backward. You also spin the Fortuna wheel, which can partially offset the penalty. Your bag resets normally for the next round.
Do the ingredient books change the strategy significantly?
Yes, meaningfully. The same chip color can have different powers depending on which book is active, so no single strategy is universally optimal. The orange/purple combo that dominates one game might be mediocre in another configuration. Reading the active books and adjusting your plan is a real skill — it’s one of the things that separates good players from great ones.