Quick Answer: Gloomhaven: Jaws of the Lion is a 1–4 player cooperative dungeon-crawling campaign game where each round you secretly choose two cards, use one card’s top action and the other’s bottom action, and work with your teammates to complete scenario objectives. There’s no game master — the game runs itself through clever card mechanics. With a built-in tutorial that introduces rules across the first four scenarios, it’s the easiest entry point into the Gloomhaven universe.
If you’ve been curious about how to play Gloomhaven: Jaws of the Lion but felt intimidated by the reputation of the full Gloomhaven box, good news — this game was specifically designed to solve that problem. It’s a 1–4 player dungeon crawler with 25 scenarios, a BGG weight of 3.60/5, and a price tag around $49.99. It’s still a meaty, complex game. It just teaches itself as you play.
What Is Gloomhaven: Jaws of the Lion?
Designer Isaac Childres and Cephalofair Games released Jaws of the Lion in 2020 as a deliberate, retail-friendly on-ramp to the Gloomhaven universe. The original Gloomhaven was a phenomenon — it hit #1 on BoardGameGeek — but its $140+ price and sprawling rulebook kept a lot of people away. Jaws of the Lion was the answer: a standalone, lower-cost version sold at Target that didn’t require a PhD to set up.
The core card mechanics are identical to the base game, but Jaws of the Lion strips away a lot of overhead. No separate rulebook, no tile-laying setup, fewer characters, and a tighter campaign. The BGG weight drops from 3.86 to 3.60 — not a massive difference on paper, but in practice the onboarding is dramatically smoother.
The Four Playable Characters
Each character has a completely unique deck and playstyle:
- Inox Hatchet — Ranged attacker with a signature “Favorite Hatchet” retrieval mechanic
- Valrath Red Guard — Melee tank who generates and spends shields
- Human Voidwarden — Support and crowd control specialist
- Quatryl Demolitionist — Melee brawler who gets bonuses from destroying obstacles
The story takes place in the dark fantasy city of Gloomhaven, where your four mercenaries get pulled into a conspiracy involving a cult called — you guessed it — the Jaws of the Lion. It’s grim and atmospheric, told through flavor text and a sticker-based campaign map. Completely self-contained, though it’s set in the same world as the base game.
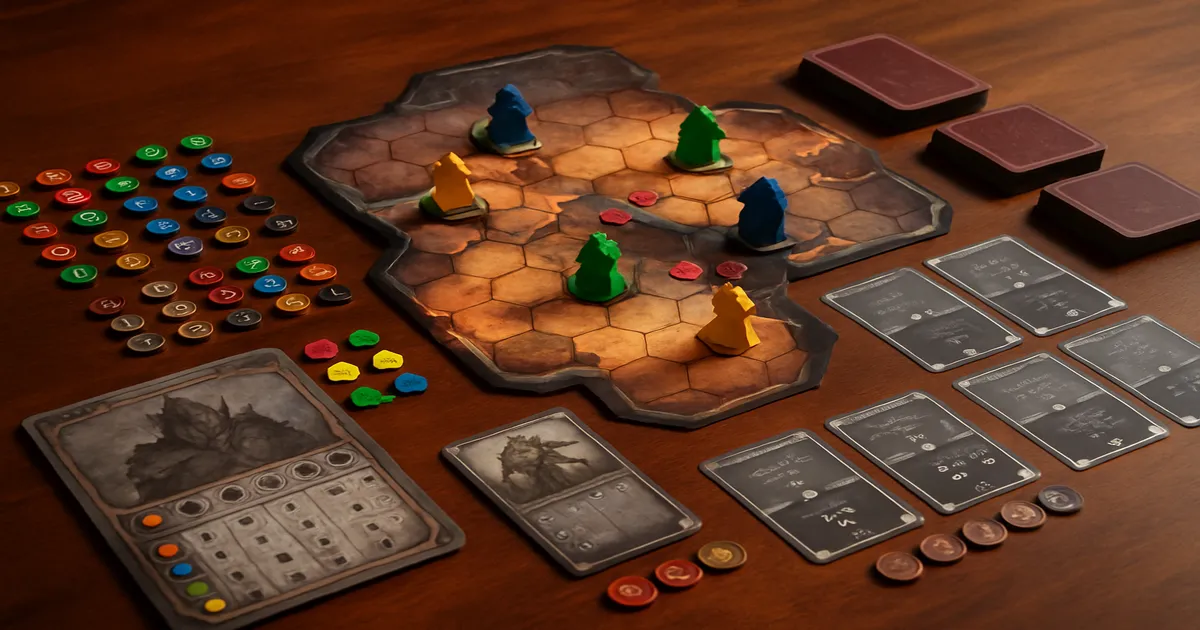
Components and Setup
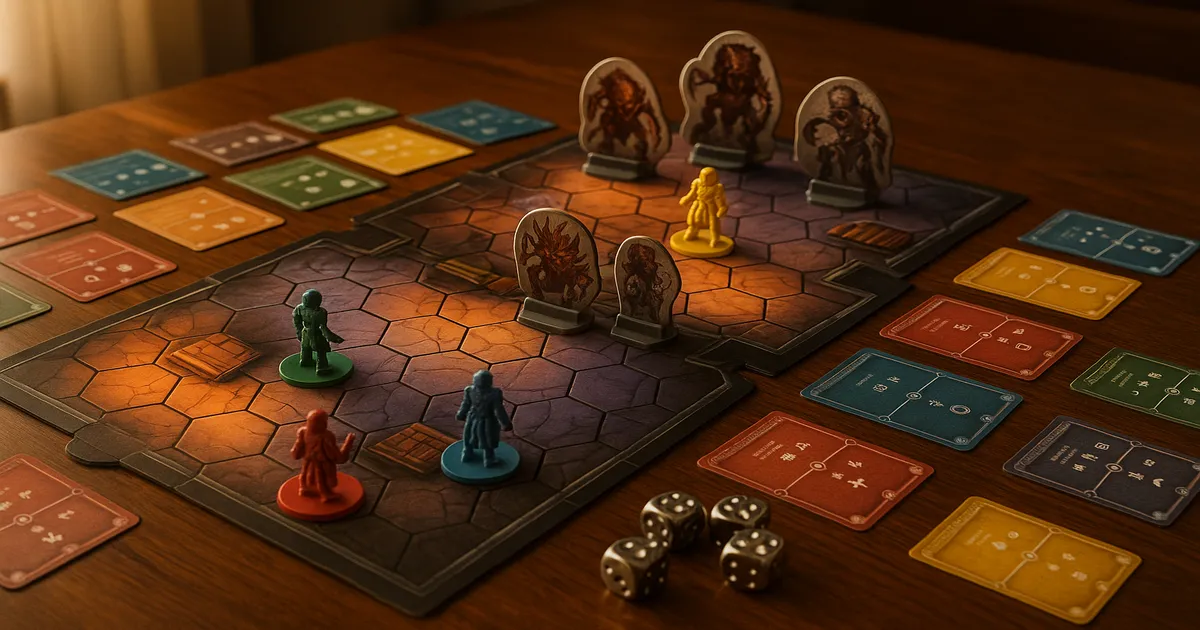
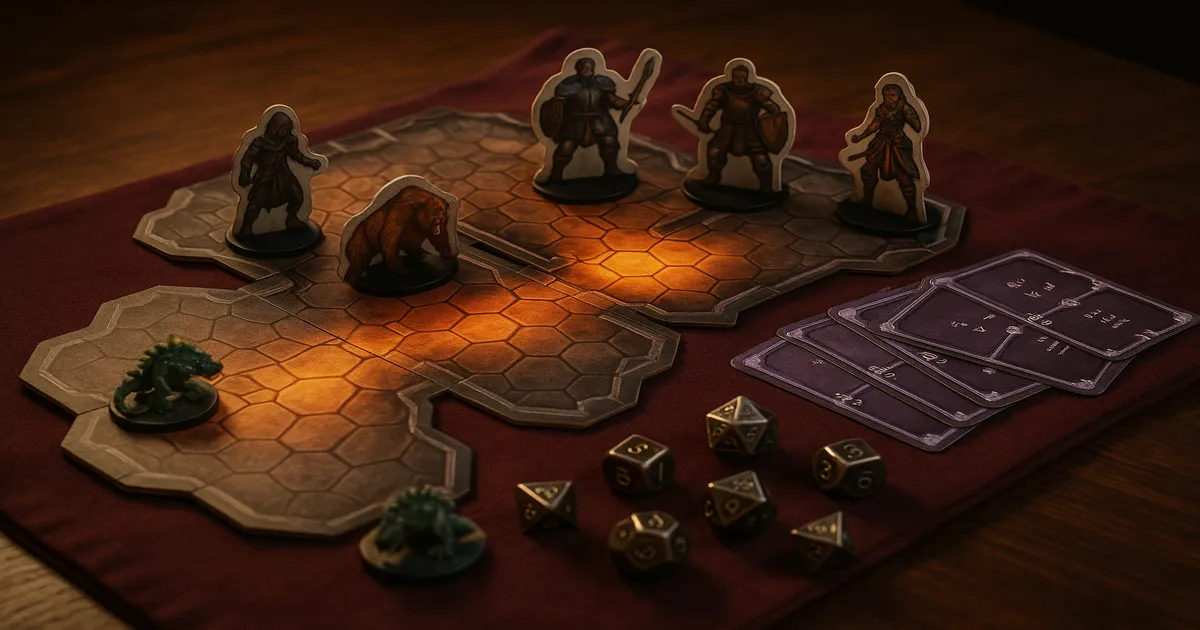
What’s in the Box
- 4 hero miniatures and character dashboards
- 4 complete ability card decks (unique per character)
- 4 attack modifier decks
- 4 character pads for campaign tracking
- 1 combined scenario/map book (~100 pages)
- Monster ability decks, stat cards, and standees with plastic bases
- Condition tokens, HP/XP dials, coin tokens, element discs
- Sticker sheets for the campaign map
The miniatures are solid plastic with good detail for the price. The ability cards are standard card sleeve size and absolutely worth sleeving before your first session — they’ll see a lot of shuffling over a full campaign.
The Scenario Book: The Smartest Thing in the Box
Instead of a separate rulebook and a bag of map tiles, you get one illustrated book. You place your figures directly on the pages. No tile setup. No hunting through a bag for the right hex. It’s genuinely elegant, and I’m surprised more games haven’t copied it.
The first four scenarios are also tutorials — each one introduces a new layer of rules with instructions printed right there on the page. By Scenario 5, you know the full game. It’s a much better experience than reading a rulebook cold.
Setting Up Your First Scenario
- Open the scenario book to Scenario 1
- Each player picks a character, takes their dashboard, ability deck, modifier deck, and character pad
- Set HP and XP dials to starting values
- Place character miniatures and monsters as shown on the page
- Follow the printed tutorial instructions — they walk you through everything
How to Play Gloomhaven: Jaws of the Lion — Round Structure
Card Selection
Every player simultaneously and secretly chooses 2 cards from their hand and places them face-down. No showing your partner, no changing your mind once you’ve picked. This is the core tension of the game — you’re committing blind, which means coordination matters even before cards are revealed.
Initiative and Action Order
Players reveal one card (the “lead card”) — its initiative number determines when you act. Each monster type flips one ability card from their deck, which tells all monsters of that type what to do this round. Figures act in order from lowest initiative to highest.
On your turn, you perform the top action of one card and the bottom action of the other, in either order. One card’s top, the other’s bottom — never both tops or both bottoms.
End of Round
Played cards go to your discard pile. Persistent effects advance. Monster ability cards are set aside. Then you do it all again.
Short Rest vs. Long Rest
When your hand runs low, you need to rest. Two options:
Short Rest: Recover all discarded cards, but randomly lose one for the rest of the scenario. Spend 1 HP to redraw if you don’t like which card you lost.
Long Rest: Skip your entire turn for one round. Recover all discards, choose which card to lose, heal 2 HP, and refresh your items.
New players almost always rest too early or too late. The sweet spot is generally when you have 3–4 cards left — enough to keep contributing while avoiding exhaustion.
Core Mechanics Explained
Cards: Discarded, Lost, and Persistent
Every card has three zones: top action, bottom action, and an initiative number in the middle. The most misunderstood part of the whole game is what happens to cards after you play them:
- Discarded: Sitting in your discard pile — you get these back when you rest
- Lost (red X symbol): Gone for the rest of the scenario. Resting does not bring them back
- Persistent (circular arrow): Stays in play with a charge token; goes to discard when charges run out
Loss cards are powerful. That’s the trade-off. Using one is a real decision.
The Attack Modifier Deck
No dice here. Every attack draws one card from your personal modifier deck. Cards range from -2 to +4, plus 2x (double damage) and Null (miss). As you earn perks, you can remove weak cards and add strong ones. Cleaning out the -1 and -2 cards early is one of the highest-value things you can do — the consistency it adds compounds over a full scenario.
Monster AI
Monsters don’t get individual decisions. Each monster type flips one ability card per round, and every monster of that type follows those instructions. For targeting, monsters move toward and attack the enemy they can reach with the fewest movement steps while still being able to attack. Not just the closest character — the one they can most efficiently path to and hit. This distinction matters a lot in corridors and around obstacles, and once you internalize it, you can start manipulating monster movement deliberately.
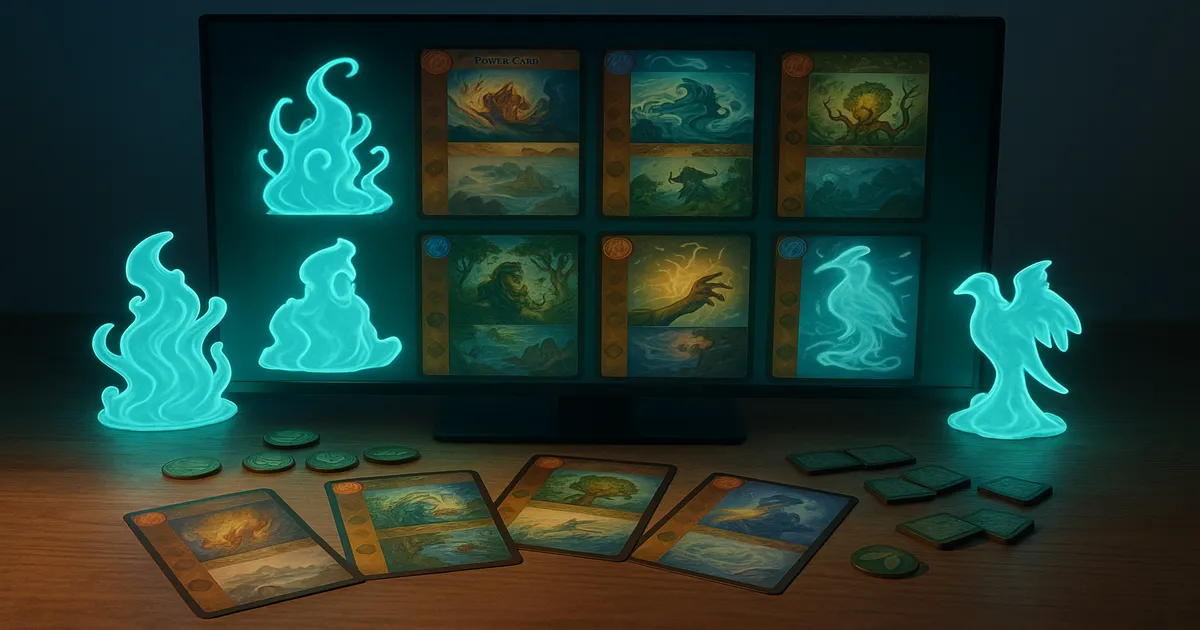
Elements
Some cards generate elements (Fire, Ice, Air, Earth, Light, Dark). Here’s the timing that trips everyone up: an element generated during a round is not available until the following round — or later in the same round if a different figure consumes it. It expires at the end of the round after it’s created if unused. Get this wrong and you’ll waste a lot of setup.
Experience, Leveling, and Perks
Specific card actions have XP symbols — performing those actions earns experience. Hit the threshold, choose a new ability card, gain a perk to improve your modifier deck, and increase your HP. Characters cap at level 9.
Gold and Looting
Coins appear when monsters die but don’t automatically go to you. Move onto the hex, use a loot action. After the scenario, coins convert to gold for the shop. It’s easy to skip in the heat of combat, and over a campaign it adds up to a lot of missed purchasing power.
The Four Characters: Quick Playstyle Guide
Inox Hatchet — His whole engine revolves around throwing and retrieving his “Favorite Hatchet” card. When you use it, it gets lost — but specific other cards bring it back. Managing that retrieve cycle is the key to playing him well. Hits hard from range, needs positioning to stay out of melee.
Valrath Red Guard — Generates Shield values and absorbs punishment for the team. Most straightforward to understand, but rewards good positioning. Being in the wrong place means your shields are wasted on nobody.
Human Voidwarden — Can manipulate monster actions and buff allies in ways no other character can. She’s the most complex of the four and requires real game-state awareness. Honestly, I’d recommend playing her second rather than first — her value isn’t obvious until you understand how the rest of the game works.
Quatryl Demolitionist — Gets attack bonuses from destroying obstacles, so her power level varies a lot by scenario. In obstacle-heavy maps she’s devastating. In open rooms she’s solid but unremarkable. Check the scenario layout before you start and adjust your card choices accordingly.
Common Mistakes (and How to Avoid Them)
Misreading monster focus rules. Monsters don’t just attack whoever is closest. They move toward the enemy they can attack using the fewest steps. In a hallway with obstacles, that might not be the character standing nearest to them.
Confusing discarded, lost, and persistent cards. Lost cards do not come back on rest. If a card has a red X on the action, using it means it’s gone until the scenario ends. This mistake alone can derail an entire run.
Getting element timing wrong. Elements are available the round after they’re created. Generate Fire this round hoping to spend it this round, and you’re going to be disappointed.
Hoarding loss cards. Every experienced player has watched a new player save their best loss card “for the right moment,” exhaust before using it, and feel terrible. Use them when they’ll have maximum impact — usually the final room.
Forgetting to loot. Coins don’t pick themselves up. It’s easy to skip in the heat of combat. Don’t.
Treating every scenario like a kill-everything mission. Sometimes the objective is to reach an exit. Fighting every monster burns cards you’ll need later. Read the win condition before you engage anything.
Strategy Tips
Read the full scenario before you start. Know the room layout, the win condition, and any special rules before placing a single figure. This lets you pace resources intelligently instead of burning loss cards in room one.
Think in card pairs, not individual cards. The right question isn’t “is this a good card?” It’s “what does this pair accomplish together?” Always evaluate the combination.
Coordinate initiatives loosely. You can discuss general intentions before card selection: “I’m going early to draw aggro,” “I’ll go late to follow up.” You can’t show cards or announce specific initiative numbers, but loose coordination is both legal and important.
Prioritize modifier deck perks that remove negatives. This is the most underrated principle in the game. Removing -1 and -2 cards makes every attack more reliable. That consistency compounds over a scenario in ways that occasionally drawing a +3 simply doesn’t match.
Position for area attacks using monster AI. Because monster focus rules are deterministic, you can predict where monsters will move. Position yourself so that when they path toward you, they cluster into a line or group your area attack can hit. It takes practice, but it’s one of the highest-skill plays in the game.
Accessories Worth Considering
A foam insert or organizer makes a real difference once you’ve punched everything out — the box gets chaotic fast. A set of HP and XP tracking rings can also replace the dials if you find them fiddly. And if you’re planning to move into the full Gloomhaven or Frosthaven after finishing this campaign, it’s worth picking up a copy to have ready.
Frequently Asked Questions
Is Gloomhaven: Jaws of the Lion good for beginners?
Yes — it’s the best entry point into the Gloomhaven system. The tutorial scenarios introduce mechanics one at a time, so you’re never hit with the full rulebook at once. That said, it’s still a heavy game (BGG 3.60/5), so expect a learning curve across the first few sessions.
How long does a full campaign take?
The 25-scenario campaign runs roughly 10–25 hours of total play depending on how quickly your group learns the system. Most groups spread this across 8–15 sessions, with individual scenarios taking 45–90 minutes each.
Can you play Gloomhaven: Jaws of the Lion solo?
Absolutely. Solo play is a legitimate way to experience the campaign. Most solo players control two characters to maintain strategic variety, though running a single character on a reduced difficulty setting is also viable.
Do you need the base Gloomhaven to play?
No — Jaws of the Lion is completely standalone. Everything you need is in the box. The characters are technically compatible with the base game, but you don’t need it to play or complete the full campaign.
What happens when you run out of cards?
If you have no cards in hand and no cards in your discard pile at the start of a round, you become exhausted and are eliminated from that scenario. Your team can continue without you, but if everyone becomes exhausted, the scenario fails. This is why hand management and resting at the right time matter so much.